Tools Needed:
- cleaning spray
- application fluid
- squeegee
- microfiber cloth
- breakaway blade
*These items are included with most Luxe Auto Concepts wet application products.
Some Things To ConsiderBefore You Get Started
- Many of our decals are rolled into shipping tubes. Rolling causes "tunneling" on the decal, which means there are spaces where the decal may separate from the backing or transfer papers. To ensure an easier installation make sure you unroll your decal and let it sit for 10 - 15 minutes before you are ready to install. It also helps to use the included squeegee to press the layers together, ensuring that there are no longer any gaps.
- When it comes to installing vinyl, the climate is very important. We suggest avoiding extreme temperatures (nothing below 60˚). It is also imperative that the installation is not attempted on a hot surface or in direct sunlight.
- In many cases you will want to trim the decal before alignment. Our decals come with excess material on the outside to ensure that your decal is not contaminated during the shipment process.
- Before you begin the installation process ensure that the space where the decal will be applied is COMPLETELY clean, smooth, and free of contaminants. To help with this we have included the microfiber cloth as well as the prep spray.
- If the area you are applying the decal to is badged or has contaminants that may not be removed with our standard prep kit you can use our Universal Debadge and Clay Bar Kit in order to ensure a smooth clean surface for installation!
You're All Set!

Step 1: Position the Decal
- Position the decal where it will be installed and use painters tape to mark the alignment in the center.
- Using the center hinge will make it easier to install the decal because you'll be installing half of the decal at a time. This is especially important when installing large decals or during DYI installations with only one person.

Step 2: Remove Backing Paper
- First, ensure that the backing paper, transfer paper, and decal are all together by running a squeegee over the decal a few more times.
- Begin to peel the transfer paper along with graphic away from the backing paper at an extreme angle.*
*If the backing paper does not lift with the paper, use your finger and apply pressure to the area and try again slowly. - Cut away excess backing paper and ensure that all paper threading (possible contaminants) are removed as well by running your finger along the edge of the paper.

Step 3: Wet Down Application Area
- Liberally spray the application area with application fluid.*
- Spray the decal with application fluid.
*Wetting the surface as well as the decal allows the decal to have some movement when you are are applying the decal. Without moisture you will be unable to reposition your decal or remove any wrinkles or bubbling in the vinyl!

Step 4: Squeegee Into Position
- Starting at the hinge (middle section) lightly squeegee out the liquid and smooth out the paper.
- Once you have smoothed out most of the decal and ensured there are no creases or wrinkles in the decal you can begin to apply more pressure.
- Remove as much liquid as you can from underneath the vinyl while using the microfiber cloth to soak up any excess moisture.

Step 5: Remover Center Hinge & Repeat Steps 2 - 4

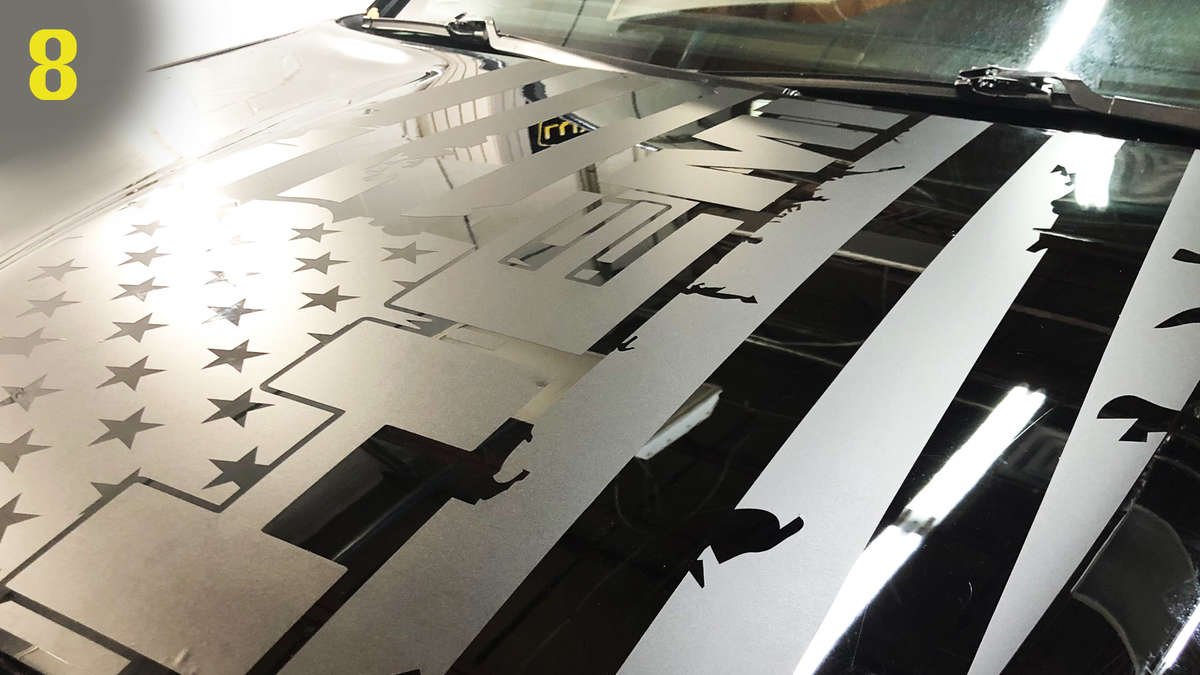
Step 6: Remove Transfer Paper
- Let decal to sit for as long as needed to allow the adhesive to dry. This may take longer in humid climates.
- Soak the paper with application fluid. This allows the paper to moisten once again and separate from the vinyl decal.
- Carefully remove the transfer paper at an extreme angle.*
*If part of the decal comes up with the paper carefully address it as you go, separating the decal from the paper and pressing it on to the installation surface.

Step 7: Remove Excess Moisture
- Once you have removed the transfer paper, carefully remove excess moisture from the decal and surface. If you have any hanging edges either press them down or use a sharp edge to remove. Press out any bubbling. If possible, position decal in sunlight to allow the adhesive to further dry and set.
You're All Set!
Step 1: Position the Decal
- Position the decal where it will be installed and use painters tape to mark the alignment in the center.
- Using the center hinge will make it easier to install the decal because you'll be installing half of the decal at a time. This is especially important when installing large decals or during DYI installations with only one person.
Post Installation Care Instructions
- DO NOT WASH OR OTHERWISE WET CAR FOR 48 HOURS.
- Immediately following installation it is suggested to leave the decal in the sun if possible in order to help the adhesive further set.
- Do not use any abrasive cleaners and avoid car washes with spinning brushes as they could snag the decal and lift it.
- If bubbling occurs we suggest using a pin to make a small hole and then carefully pressing out the air. If there are hanging or lifted pieces of vinyl it is suggested that those sections are trimmed as soon as possible to prevent further peeling.
- Avoid getting any waxes or polishes on MATTE or SATIN decals as these products can discolor the vinyl and change the sheen.
Like what you saw?
Check out our hood bulge decals or contact our custom department for a bespoke hood bulge decal!